[mysql] mysql 8.4 ver DB 자동 원격 백업 (CentOS 9 stream)
1. mysql 설치

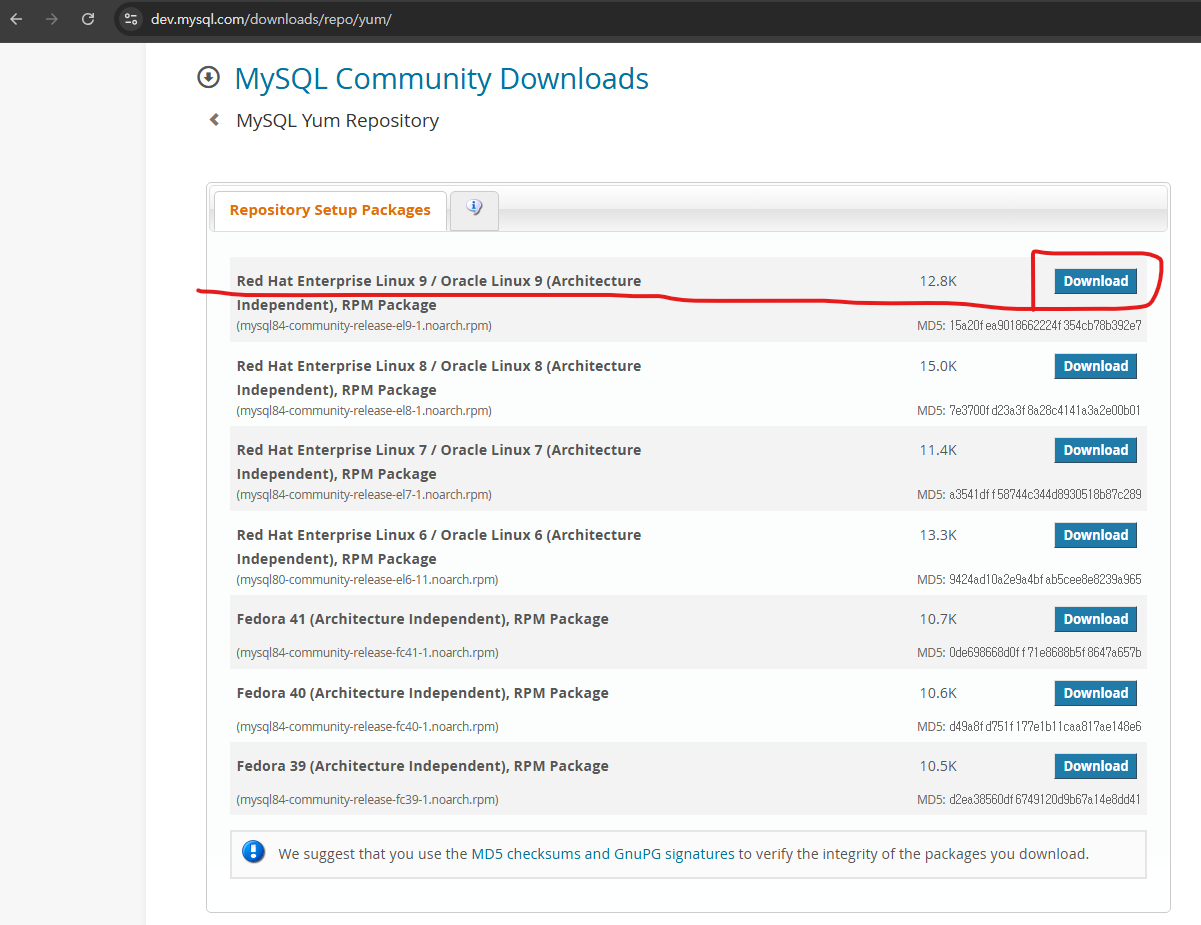
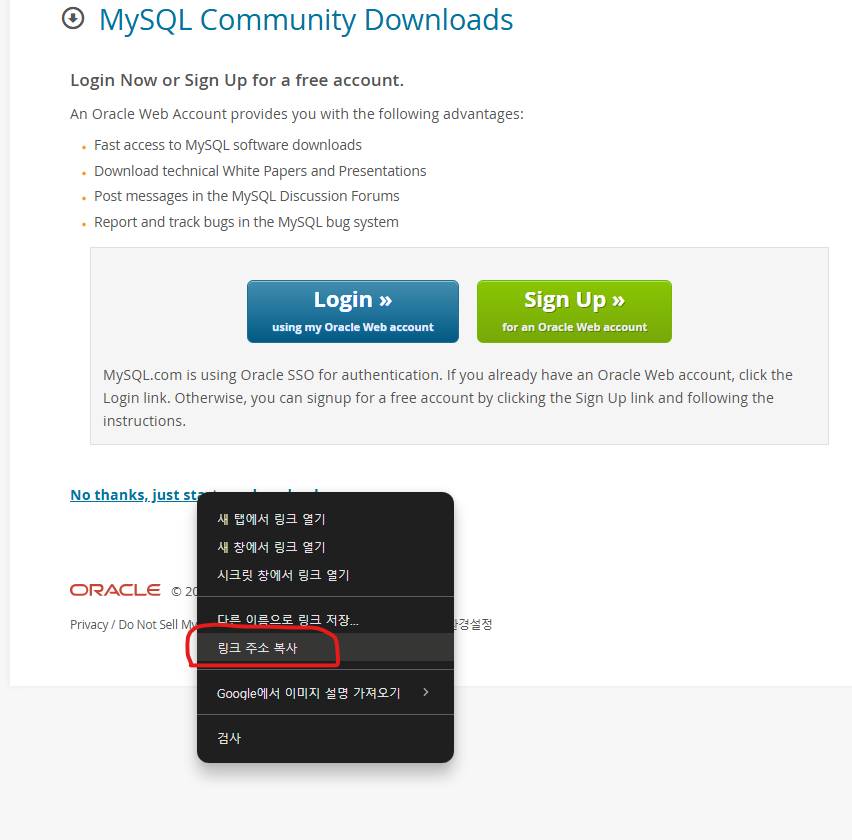

wget https://dev.mysql.com/get/mysql84-community-release-el9-1.noarch.rpm
rpm -ivh mysql84-community-release-el9-1.noarch.rpm
dnf clean all
dnf install -y mysql mysql-server
2. mysql 8.4 초기 root PW 설정
systemctl start mysqld
more /var/log/mysqld.log | grep password

mysql_secure_installation
초기 패스워드 : ey+4Rf%v;HRl 입력
신규 패스워드 입력
이후 전부 Y 로 패스
mysql -u root -p 로그인 후
test db 생성

mysql workbench 로 접속해서 테이블 생성할 예정이니
mysql root 계정 외부 접속 권한과 centos 9 stream 의 firewall 설정 필요
use mysql;
select host,user from user;
update user set host='%' where user = 'root';
flush privileges;
이때 이 명령어는
mysql_secure_installation 할 때 중간에
Disallow root login remotely? (Press y|Y for Yes, any other key for No) :
질문이 나올 시 N 로 대신 할 수 있음.

quit;
firewall-cmd --permanent --add-port=3306/tcp
firewall-cmd --reload
3. 워크밴치 설치
https://dev.mysql.com/downloads/workbench/
MySQL :: Download MySQL Workbench
dev.mysql.com
위 링크에서 설치
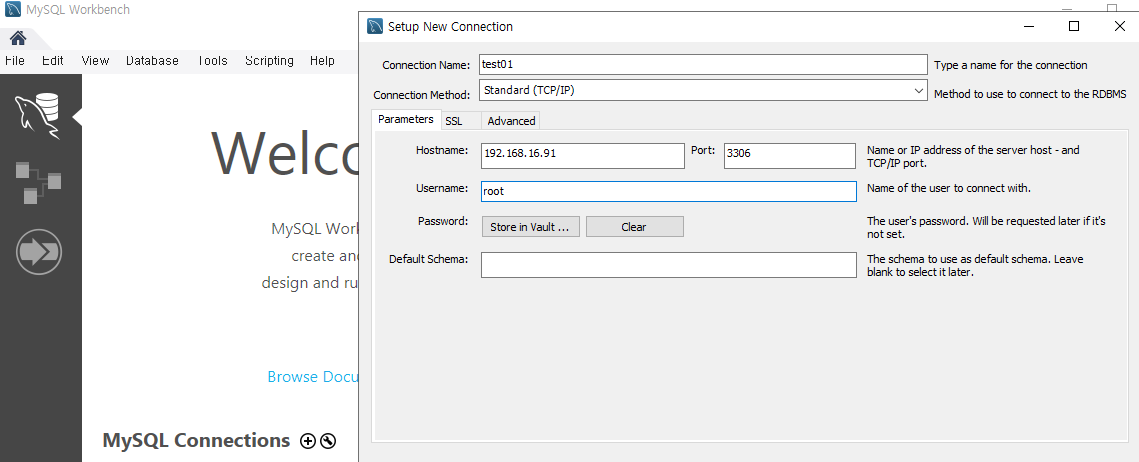
설치 후 MySQL Connections 옆 + 클릭 후 커넥션 추가

test 아무거나 입력 후 apply
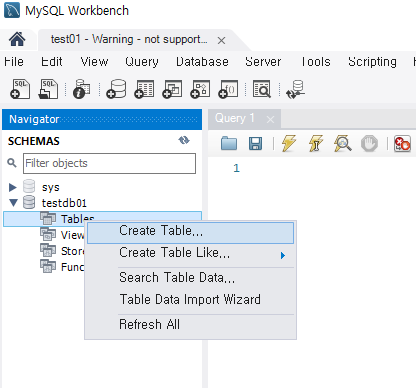
mysql 에서 DB 및 테이블 확인


db 세팅은 끝
4. /etc/my.cnf 에 mysqldump 시 PW 무질의를 위한 아래 내용 추가
[mysqldump]
user=root
password=Test12#4
5. DB 백업 스크립트 생성
mkdir -p /backup/db
아래 스크립트 작성 (db-backup.sh)
#!/bin/bash
DATE=$(date +%Y-%m-%d_%H:%M:%S)
BACKUP_DIR=/backup/db
#mysqldump 로 로컬 백업
mysqldump --defaults-extra-file=/etc/my.cnf centos_9_1_DB_01 > $BACKUP_DIR/backup_$DATE.sql
# 2일 이상 지난 데이터는 삭제
find $BACKUP_DIR -ctime +2 -exec rm -f {} \;
작성 후 권한 추가 및 mysqldump 백업 테스트
chmod 700 db-backup.sh
./db-backup.sh
allow denid 에러 발생 시
DB에서 아래 명령어 입력
grant all privileges on *.* to 'root'@'%';
grant all privileges on *.* to 'root'@'localhost';
후 mysqld restart
6. 로컬 DB 백업 스크립트 cron 등록
crontab -e
5 * * * * /root/db-backup.sh
5분마다 돌게 끔 테스트
7. rsync (원본 서버 말고 백업 서버에서 가져오기) (PW 무질의)
백업할 서버에서
dnf install -y rsync
rsync 전용 계정 생성

생성 후 로그인 후 SSH openssl 키 값 생성

ssh-copy-id 로 키값 자동 전달 및 ssh 연결 테스트
이 때 원본 서버도 rsync 계정 생성 필요

rsync -avh rsync@192.168.16.91:/backup/db/ /home/rsync/backup
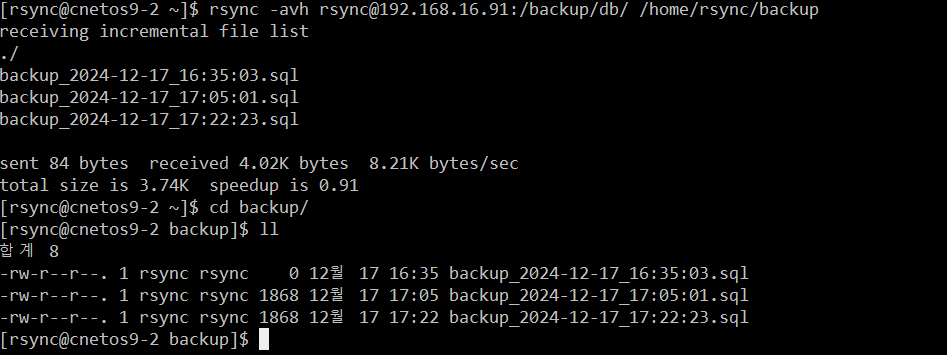
가져오기 확인
이후 rsync 명령어를 cron 등록 후 자동으로 syslog 백업 설정 완료.